Pages

Tuesday, August 31, 2010

CHENAI TAWA ROAST ( YAM ROAST )


Chenai is known as Elephant Foot Yam in India. It is a favourite vegetable of the Keralites & is used in a lot of their dishes. It is grown in the backyard of almost all the houses in Kerala. The recipe i am giving today was given to me by my Sister-in law who got it from her grand mother. It is a yummy dish & is a vegetarian substitute for fish fry.


Preparation Time: 15 mts Cooking Time: 20 mts Serves: 2-3


Ingredients:


Chenai - 250 gms
Tamarind - small lime sized ball
Besan flour (kadalai mavu) - 2 tbsp
Rice flour - 1 tbsp
Chili powder - 1 tsp
Turmeric powder - 1/2 tsp
Refined oil - 2 tbsp
Salt - to taste


Method:


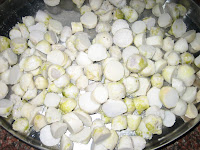
Remove the outer skin of the chenai. Slice it in to thin 1 inch square pieces. Squeeze the tamarind in 1 cup of water. Mix the besan flour, rice flour, chili powder, turmeric powder & in a plate. Put the chenai pieces in the tamarind water & boil till the chenai is cooked. Drain the water & immediately roll it in the mixed flour. Heat a tawa & grease it with oil. Keep the pieces on the tawa. Pour oil all around & fry it on both sides till it
is golden brown. Chenai tawa roast is ready.


Variations:


Instead of making tawa roast, we can deep fry it in oil. The flour mix should be made in to a paste. The pieces should be dipped in to the paste & fried.


Tips:


  1. We can add asafoetida powder to the flour mix to give a nice flavour.
  2. Make sure that the chenai stays firm & is not over cooked.
  3. Sometimes the yam will be very hard. In such case, it can be cooked in a pressure cooker.
  4. Chenai has to be boiled in tamarind water or else it will irritate the tongue.


Taste it & enjoy.

Monday, August 30, 2010

KADALAI CURRY (BLACK CHICKPEAS CURRY)


Kadalai curry is a typical Kerala dish. It is available in all hotels & tea shops in the state. It is eaten in combination with puttu which is yet another Kerala breakfast item available everywhere.


Preparation Time: 15 mts Cooking Time: 30 mts Serves: 3-4


Ingredients:


Kothu kadalai (black chickpeas) - 1 cup
Big onions - 2 nos
Green chilies - 2 nos
Ginger - 1/2 inch piece
Curry leaves (kariveppilai) - 2 sprigs
Chili powder - 1 tsp
Coriander powder - 2 tsp
Turmeric powder - 3/4 tsp
Mustard seeds - 1/2 tsp
Refined oil - 2 tbsp
Salt - to taste


Method:


Soak the kothukadalai for 10 hrs. Drain the water & add 2 cups of fresh water. Pressure cook it with salt & turmeric powder till it is soft. Chop the onions. Slit the green chilies & grate the ginger. Heat the oil in a pan & crackle the mustard seeds. Add the chilies, ginger & onions. Fry till the onion starts to turn brown. Then add the turmeric, chili & coriander powders. Fry them till the raw smell goes off. Then add the boiled kadalai along with the water. Add enough salt & let it simmer for 10 mts. Add the curry leaves. Kadalai curry is ready. This can be had with puttu, idli or dosa.


Variations:


We can do this curry in a different way by adding coconut milk to it. We can also grind coconut & add to this curry. I will give the recipe for that later.


Tips:


  1. Kerala dishes will always taste good & authentic only when we add coconut oil.
  2. If the curry is watery, add some rice flour to thicken it.
  3. After the curry is ready, add some fresh coconut oil & a sprig of curry leaves to it. This will give the curry a nice flavour.
  4. For this curry, the coriander powder should always be 2 times more than the chili powder. Chili powder can be added according to our spice levels.


Taste it & enjoy.

Sunday, August 29, 2010

CAPSICUM & CORN PULAO


Sundays are variety rice days in our house. So i try my hand on different type of rice dishes most of the Sundays. Today i had frozen corn & capsicum in the kitchen. So decided to try my hand on this dish.


Preparation Time: 15 mts Cooking Time: 20 mts Serves: 2-3


Ingredients:


Basmathi rice - 1 cup
Capsicum - 150 gms
Frozen sweet corn - 100 gms
Green chilies - 2 nos
Big onions - 2 nos
Cinnamon - 1 inch piece
Cloves - 2 nos
Black cardamon - 1 no
Tej patha (birinji elai ) - 1 no
Ginger garlic paste - 1 tsp
Refined oil - 2 tbsp
Ghee - 2 tbsp
Salt - to taste


Method:


Wash the rice, drain it & keep aside. Chop the onions in to thin pieces. Cut the capsicum in to thin strips. Slit the green chilies. Heat the oil & the ghee in a frying pan. Add the cinnamon, cloves, cardamon & tej patha & fry them. Add the onions & chilies & fry them till the onion is pale in colour. Add the capsicum & corn & fry for some more time. Add the ginger garlic paste & fry till the raw smell goes off. Then add the rice & fry. The water from the rice should evaporate & it should start leaving the sides of the pan. Then add 1 1/2 cups of water & enough salt. Cook it in a cooker or a rice cooker. Capsicum & corn pulao is ready.


Variations:


The same type of pulao can be done with carrot, beans, peas, cauliflower etc.


Tips:


  1. Always make sure that the rice is just immersed in the water. That will be the right amount of water.
  2. We can add some garam masala powder to the pulao to enhance the masala flavour.
  3. As frozen corn is sweet, we can grind the chilies & add it while frying the onions. This will give some spice to the pulao.
  4. Instead of water, we can make it a mix of either milk & water or coconut milk with water. This will give the pulao a rich taste.

Taste it & enjoy.

Saturday, August 28, 2010

PARUPPU PODI


In olden days people used to prepare these podis & store them for rainy days. When there is a shortage of vegetables, these podis come in handy. They are also healthy because they are made of lentils. Podis are always a welcome change from our routine menu.


Preparation Time: 10 mts Cooking Time: 10 mts


Ingredients:


Thur dal (red gram dal) - 1 cup
Red chilis - 6 nos
Black pepper - 1 tsp
Salt - to taste


Method:


Heat a pan. Dry fry all the ingredients till the thur dal starts to turn brown. Fry the salt in a dry pan. When it is all cool, powder them in the mixer till its a smooth powder. Paruppu podi is ready.


Variations:


Paruppu podi can be made with pottu kadalai also. I will give the recipe for that later in my blog.


Tips:


  1. While frying the ingredients, fry the pepper & chilies separately & then fry the tur dal.
  2. Salt should be heated up in the frying pan till the water in it evaporates & it gets in to a free flowing consistency.
  3. For an emergency, we can add some water to this podi & convert it in to paruppu thugayal.


Taste it & enjoy.

Friday, August 27, 2010

QUICK MAIDA APPAM


Appam is a traditional South Indian sweet. It is made during festivals & poojas. It is mildly sweet & is a favourite of kids & elders alike.


Preparation Time: 15 mts Cooking Time: 15 mts Serves: 3-4


Ingredients:


Maida (all purpose flour ) - 1 cup
Jaggery ( vellam/gur ) - 1 1/2 cups
Cardamon powder - 1 tsp
Scrapped coconut - 1/4 cup
Refined oil - 1 1/2 cups


Method:


Take the powdered jaggery in a vessel & add 1/2 cup of water. Heat it till the jaggery dissolves in the water. Strain it & allow it to cool. Then slowly add the maida & stir it constantly so that it doesn't form any lumps. Add the cardamon powder & coconut. Mix it well. The batter should be in pouring consistency but not watery. Heat oil in a deep frying pan. Take the batter in a small ladle & pour it in the hot oil. Fry it well on both sides. Tasty appam is ready.


Variations:


We can make appam with wheat flour also. The traditional appam is made with rice. Raw rice should be soaked & ground with jaggery to a batter consistency. This appam is made in the kuzhipaniyaram chatti. The picture & the recipe for kuzhipaniyaram is given in my blog.


Tips:


  1. Always make sure the jaggery water is cool while adding the flour.

  2. Also make sure to strain the water before adding flour to it. Jaggery has lot of impurities especially limestone deposits.

  3. We can also add one mashed banana to the batter. This will make it tastier & soft.

  4. Once the oil becomes hot, reduce the flame & fry the appam in slow heat so that it gets cooked well in the inside & doesn't get over fried.

  5. Keep the ladle closer to the oil while pouring the batter so that the batter is in one place & doesn't spread.

  6. We can add little rice flour to the batter to get crispy appams.


Taste it & enjoy.

Thursday, August 26, 2010

South Indian Festivals


Last weekend i was busy with "Varalakshmi Pooja". This pooja is normally done by families who have been doing it for generations. When a newly wed girl enters in to a family with the tradition of doing this pooja, she also takes on this custom. It comes on a Friday in the Tamil month of Adi or Avani. This year the pooja day fell on Friday, the 20th of August. Ladies celebrate it in a grand way by decorating the face of Varalakshmi Amman & then cooking varieties of food. Items like idli, kozhakkatai, variety rice, vadai, appam, sundal & payasam are prepared for the pooja. I will give the recipes for a few of these items in my future blogs .


Week end was also time for another festival. This is the famous Onam festival of Kerala. Kerala was once ruled by King Mahabali. Keralites believe that their king visits them every year during this festival. They adorn their houses with rangolis done with flowers to invite the king in to their homes. This rangoli is called "Pookalam". The whole family gets together on this occasion & a grand feast is prepared. This feast is called "Ona Sadya". Sadya in Malayalam means feast. More than 20 different varieties are prepared for this feast & served in a plantain leaf. Will give the recipes of a few items soon. Onam this year was on 23rd August.
The festivals yet to come are - "Gokulashtami" or "Sri Krishna Jayanthi" on Sept. 1st & "Vinayaka Chathurthi" on Sept. 11th. I will give details about these festivals in due course.

Friday, August 20, 2010

LIME RICE


Variety rice is always easy to make & easy to pack for a picnic. It doesn't spill out of the box & tastes good even when it is cold. Lime rice has the spice of chilies the tangy taste of the lemon in it. It tastes good with vadams or fryums.


Preparation Time: 10 mts Cooking Time: 20 mts Serves: 2-3


Ingredients:


Raw rice - 1 cup
Turmeric powder - 1/2 tsp
Mustard seeds - 1 tsp
Bengal gram dal (kadalai paruppu) - 2 tsp
Refined oil - 2 tsp
Green chilies - 3 nos
Lime/lemon - 2 nos
Salt - to taste


Method:


Wash & cook the rice. Each grain of rice should be separate. Soak the Bengal gram dal ( kadalai paruppu) in little water. Cut the green chilies in to small pieces. In a pan heat the oil & fry the mustard seeds. Drain the Bengal gram dal & add that to the oil. Add the chilies too & fry them. Then add the turmeric powder & fry till the raw smell goes off. Switch off the heat & add the cooked rice & salt & mix well. Squeeze the juice of 2 lemons& add it to the rice & mix well. Lime rice is ready.


Variations:


We can add some grated carrot while frying the dal & other items. For those who like garam masala taste, we can add a little masala powder also.


Tips:


  1. While adding lime juice, taste it & add as required.
  2. Add the salt in the oil itself while frying the chilies. This way, the salt will spread evenly in the rice.
  3. While cooking the rice add a little salt & cook, so that the rice will taste good.


Try it & enjoy.

Monday, August 16, 2010

RADISH RAITHA


Radish is a root vegetable. It is known as mooli in Hindi, mullangi in Tamil & Malayalam. Radish is a good source of folic acid, calcium & potassium. The leaves of radish plant can also be used in cooking. We have 2 types of radish in India - white & red.


Preparation Time: 10 mts Cooking Time: 5 mts Serves: 2


Ingredients:

White radish - 150 gms
Curd (yogurt) - 1 cup
Mustard seeds - 1/2 tsp
Refined oil - 1/2 tsp
Asafoetida powder - 1/4 tsp
Salt - to taste


Method:


Wash & peel the radish. Grate it with a grater. In a dish add the grated radish, curd & salt. Mix it well. Heat the oil in a pan & splutter the mustard seeds. Add the asafoetida powder. Pour it on top of the raitha. Garnish with coriander leaves. Raitha is ready.


Variations:


We can grind some coconut & green chili & add it to the curd. This will improve the taste of the raitha.


Tips:


Radish has a pungent smell. So after grating the radish, add some salt & mix it well. Heap it on one side of a plate & keep the plate in a slightly slanting position. Water will come out of the radish. then squeeze the water out of the radish & use it in the raitha.


Try it & enjoy.

Sunday, August 15, 2010

RAJMA MASALA (KIDNEY BEANS GRAVY)


Rajma or kidney beans was brought to India centuries back from Mexico. In North India it is used in various dishes. There are 2 types of rajma - red & striped variety. Here i have used the striped variety to make rajma masala. This dish tastes good with plain rice or jeera rice.


Preparation Time: 10 mts Cooking Time: 30 mts Serves: 2


Ingredients:


Rajma (any variety) - 1 cup
Cinnamon - 1/2 inch piece
Cloves - 2 nos
Black cardamom (bada elaichi) - 1 no
Chili powder - 1 tsp
Turmeric powder - 1/2 tsp
Jeera powder - 1/4 tsp
Coriander powder - 1/2 tsp
Big onion - 1 no
Tomato - 1 no
Ginger garlic paste - 1/2 tsp
Refined oil - 2 tbsp
Salt - to taste


Method:


Wash & soak the rajma for 8-10 hrs. Alternately, we can soak it the previous night. Cut the onions in to small thin slices. Chop the tomatoes in to small cubes. Pressure cook the rajma with a little salt & little turmeric powder till it is soft. Heat oil in a pan & fry the cinnamon, cloves & cardamom. Add the sliced onion & fry it till it turns pale. Add the tomatoes & fry for some more time. When it is almost cooked, add the ginger garlic paste & fry. When the oil starts to separate, add the turmeric, chili, jeera & coriander powders. Fry well till the oil separates. Add the cooked rajma & enough water. Allow it to cook & soak in the masala. Garnish it with coriander leaves. Rajma masala is ready.


Variations:


We can grind the onions, tomato, fresh ginger & garlic for the gravy. Fry this in the oil along with the powders till oil separates. Add the rajma & cook till its ready.


Tips:
  1. It is better to cook rajma masala much ahead of time so that the beans get soaked in the gravy & absorbs all the masala.
  2. Always pressure cook the rajma with salt so that it tastes well.
  3. We can also add little amchur powder to give it a tangy taste.
  4. Some rajma beans have a bitter taste. So it is better to drain the water in which it is soaked & use fresh water to pressure cook it.
  5. Adding a little chole masala to the gravy will give it a nice taste.
Try it & enjoy.

JEERA RICE


Jeera or cumin seeds is a very important spice in Indian cuisine. It is known as jeerakam in Malayalam & Tamil. Jeera is another plant which is native to India. Our ancestors have realised the medicinal value of jeera long time back. Jeera helps in digestion. In Kerala water is boiled with little jeera in it & consumed as drinking water. Jeera is also rich in iron. Jeera rice is the most simple & delicious recipe one can make.


Preparation Time: 10 mts Cooking Time: 20 mts Serves: 2-3


Ingredients:


Jeera - 1 tbsp
Green chilies - 3 nos
Basmathi rice - 1 cup
Ghee - 2 tsp
Refined oil - 1 tsp
Salt - to taste


Method:


Wash the rice, drain it & keep it aside. Slit the green chilies. Heat the ghee & oil in a pan & fry the jeera & the green chilies. Then add the rice & fry till it is dry & leaves the pan. Pour 1 1/2 cups of water. Add the salt, cover the pan & cook in low heat. Cook it till each grain of rice is separate & well cooked. Jeera rice is ready. This will taste good with rajma masala.


Variations:


There is not much of a variation in this except that we can add some onions & spices like cinnamon, cloves & cardamom. But this might taste more like fried rice & not jeera rice.


Tips:


  1. Different varieties of rice will need different amount of water. So the best way is to add just enough water to immerse the rice. This way it will cook in the right way.
Try it & enjoy.

Saturday, August 14, 2010

NELLIKAI THAIR PACHADI (GOOSEBERRY RAITHA)


Gooseberry is an indigenous plant found in Asian countries & Europe. It is called nellikai in Tamil & Malayalam and amla in Hindi. Gooseberry is rich in vitamin-c & antioxidants. It is used in ayurvedic medicine because of its curative properties. It is used in cosmetic products also. Elders say that eating a gooseberry is equal to eating an apple. This is a very simple & delicious recipe i learnt from my mother in law.


Preparation Time: 10 mts Cooking Time: 10 mts Serves: 3-4


Ingredients:


Gooseberry (nellikai) - 100 gms
Green chili - 3 nos
Ginger - 1 inch piece
Fresh curd (yogurt, thair) - 1 cup
Mustard seeds - 1/2 tsp
Refined oil - 1 tsp
Salt - to taste


Method:


Boil the nellikai with enough water & salt. When ready, break it open & remove the seeds. Grind the nellikai, green chilies, ginger & salt together in a mixer. Make it in to a smooth paste. Put the paste in a bowl & add the curd & salt if needed. In a pan, heat the oil & fry the mustard seeds. Pour it on top of the pachadi. Nellikai thair pachadi is ready.


Variations:


We can add some coconut also along with the other ingredients while grinding. But i prefer it without the coconut because it will change the taste of the pachadi.


Tips:


  1. While boiling the nellikai, add a pinch of turmeric powder to the water. This will give it a nice flavour & shine.
  2. Boil it whole so that it'll b easy to remove the seeds.


Try it & enjoy.

Friday, August 13, 2010

CHEPPANKIZHANGU ROAST


Colocasia, also known as Taro is a tropical plant which is grown in Asia & other tropical countries. It is known as cheppankizhangu in Tamil, chembu in Malayalam & Arbi in Hindi. Both the roots & the leaves of the plant are used in cooking. My recipe is for the cheppankizhangu roast.


Preparation Time: 20 mts Cooking Time: 30 mts Serves: 2


Ingredients:


Cheppankizhangu - 1/2 kg ( 500 gms)

Chili powder - 2 tsp

Turmeric powder - 1/2 tsp

Asafoetida powder - 1/2 tsp

Refined oil - 2 tbsp

Mustard seeds - 1/2 tsp

Salt - to taste


Method:


Wash the cheppankizhangu & boil it with the skin in an open pan. When it starts to soften, drain the water & peel it. Cut it in to small pieces. Heat oil in a pan & add the mustard seeds. After they splutter, add the cut cheppankizhangu, salt, chili powder, turmeric powder, asafoetida & mix well. Roast it in slow fire. It will be ready in 1/2 hr.


Variations:


We can mix some basen powder to the pan along with all the other ingredients & roast. This will make it very crisp & give a different taste also.


Tips:


  1. Keep the cut cheppankizhangu in a plate. Add 1 tsp of refined oil & other spices & mix them all well. Then put it in the pan & roast it. This way the spices will spread evenly & the roast will come out well.
  2. Sometimes the cheppankizhangu will irritate our throats. In such cases, we can add some tamarind water to the roast. This will take away the irritation.


Try it & enjoy.

Saturday, August 7, 2010

COCONUT CHUTNEY


Coconut chutney is an essential combination with idli & dosa. Most hotels & restaurants have different varieties of chutneys. This is the basic chutney I've made. We can use our creativity & add other ingredients to make chutney to our taste.


Preparation Time: 10 mts Cooking Time: 5 mts Serves: 3-4


Ingredients:


Scrapped coconut - 1/2 cup
Green chilies - 3 nos
Ginger - 1/2 inch piece
Mustard seeds - 1/2 tsp
Black gram dal (urud dal) - 1/4 tsp
Roasted bengal gram dal - 2 tsp
Refined oil - 1/2 tsp
Salt - to taste


Method:


Grind the scrapped coconut, chilies, ginger, roasted bengal gram dal (pottukadalai ) & salt together. Heat the oil, add the seasoning & pour it on top of the ground paste & mix it well. Coconut chutney is ready. This chutney will be good with idli, dosai, adai etc.


Variations:


Different people make coconut chutney in different ways. Some people add garlic to their chutney. Some others don't add ginger & pottukadalai, but add tamarind to it.


Tips:


  1. While grinding, don't make it in to a paste, but grind it a bit coarsely. This will give the chutney a good taste.
  2. We can also add some coriander leaves while grinding to give it a nice flavour.


Try it & enjoy.

QUICK MANGO PICKLE


Mango is another tropical fruit. Just like the bananas, mangoes can also be used in both its raw & ripe form. Raw mango is used a lot in Kerala cooking. A variety of pickles are made out of raw mango. Each state has its own version of mango pickle. The pickle i have made today is a simple & easy to make recipe.


Preparation Time: 10 mts Cooking Time: 3 mts Serves: 4-5


Ingredients:


Raw mango - 1 no
Chili powder - 1 - 1 1/2 tsp
Turmeric powder - 1/2 tsp
Asafoetida powder - 1/2 tsp
Mustard seeds - 1/2 tsp
Refined oil - 1 tbsp
Salt - to taste


Method:


Cut the mango in to fine pieces. Put them in a dish & add the salt, chili powder & turmeric powder. Mix well. Heat oil in a pan & fry the mustard seeds & then add the asafoetida powder. Pour it in the cut mango & mix it well. Mango pickle is ready.


Variations:


There are lots of different ways of making mango pickle & each has its own taste. A small variation of this pickle is to cut the mango in to big pieces & rest of the process is the same.


Tips:

  1. While adding the chili & turmeric powder, put them in a heap in the center of the cut mango. Heat the oil & add the seasoning & pour this hot oil on top of the heaped powders. Then mix it all well & add the salt also. This way the powders will not have the raw taste.


Try it & enjoy.

Wednesday, August 4, 2010

RAW BANANA ROAST (VAZHAKKAI ROAST )


Banana is a tropical plant. It grows in all of Asia & many other countries too. Almost all parts of the banana plant are used for various purposes. The flower, trunk & fruit are used in cooking. In South India, in most places food is served in banana leaves. These days they make disposable plates & cups using banana fiber. In India, both raw & ripe bananas are used in cooking.


Preparation Time: 10 mts Cooking Time: 10 mts Serves: 2


Ingredients:


Raw banana - 2 nos
Turmeric powder - 1/2 tsp
Chili powder - 1 tsp
Asafoetida powder - 1/4 tsp
Mustard seeds - 1/2 tsp
Black gram dal (urud dal) - 1/2 tsp
Refined oil - 1 1/2 tbsp
Salt - to taste


Method:


Remove the skin of the banana & cut it in to small pieces. Heat the oil in a pan & fry the mustard seeds. When they are fried, add the urud dal & fry for sometime. Add the cut banana pieces. Sprinkle the chili powder, turmeric, asafoetida & salt. Mix them all very well. Cover the pan & cook in reduced heat. When the banana is cooked, remove the cover & fry it till it is roasted very well.


Variations:


Raw banana can be cooked in various different ways. The cut pieces can be boiled in water & then roasted. We can also make gravy items using raw bananas. I will discuss about the gravy items later in my blog.


Tips:


  1. Cut the banana in to small pieces so that they get roasted well.
  2. There is no need to add any water to cook the bananas. They will cook in their own steam & get roasted.


Try it & enjoy.